Serverless architecture reference (P-1)


Inspiration
At Softup Technologies we tend to build robust, easy maintainable applications and trying to keep the infrastructure cost at the minimal. This is one of the reasons we thought of building a Serverless architecture reference on AWS. Going serverless where it is needed, can cut the costs at a minimum level.
Quick calculation:
For 1,000,000 requests with 128 mb allocated memory and estimated execution time of 2000 ms, the cost will be $4.37/month. It is quite cheaper comparing it to an EC2 instance that will keep running day and night. Lambas are also scalable, AWS manages the traffic from behind the scenes, and we won't have the need to worry.
The goal of this boilerplate is to have the infrastructure up and running in about 3 to 4 hours and have a prototype ready in 10 days for the client.
We will follow the path of writing infrastructure as code using AWS CDK, which is an abstraction over CloudFormation. The code is written once, tested, and used anytime when you have to bring up an infrastructure. You just need to deploy the components you need.
The boilerplate will include some common components that are needed in every infrastructure, and also specific ones.
Tools we have decided to use
- AWS CDK for writing our infrastructure components.
- Serverless framework for building our lambda services.
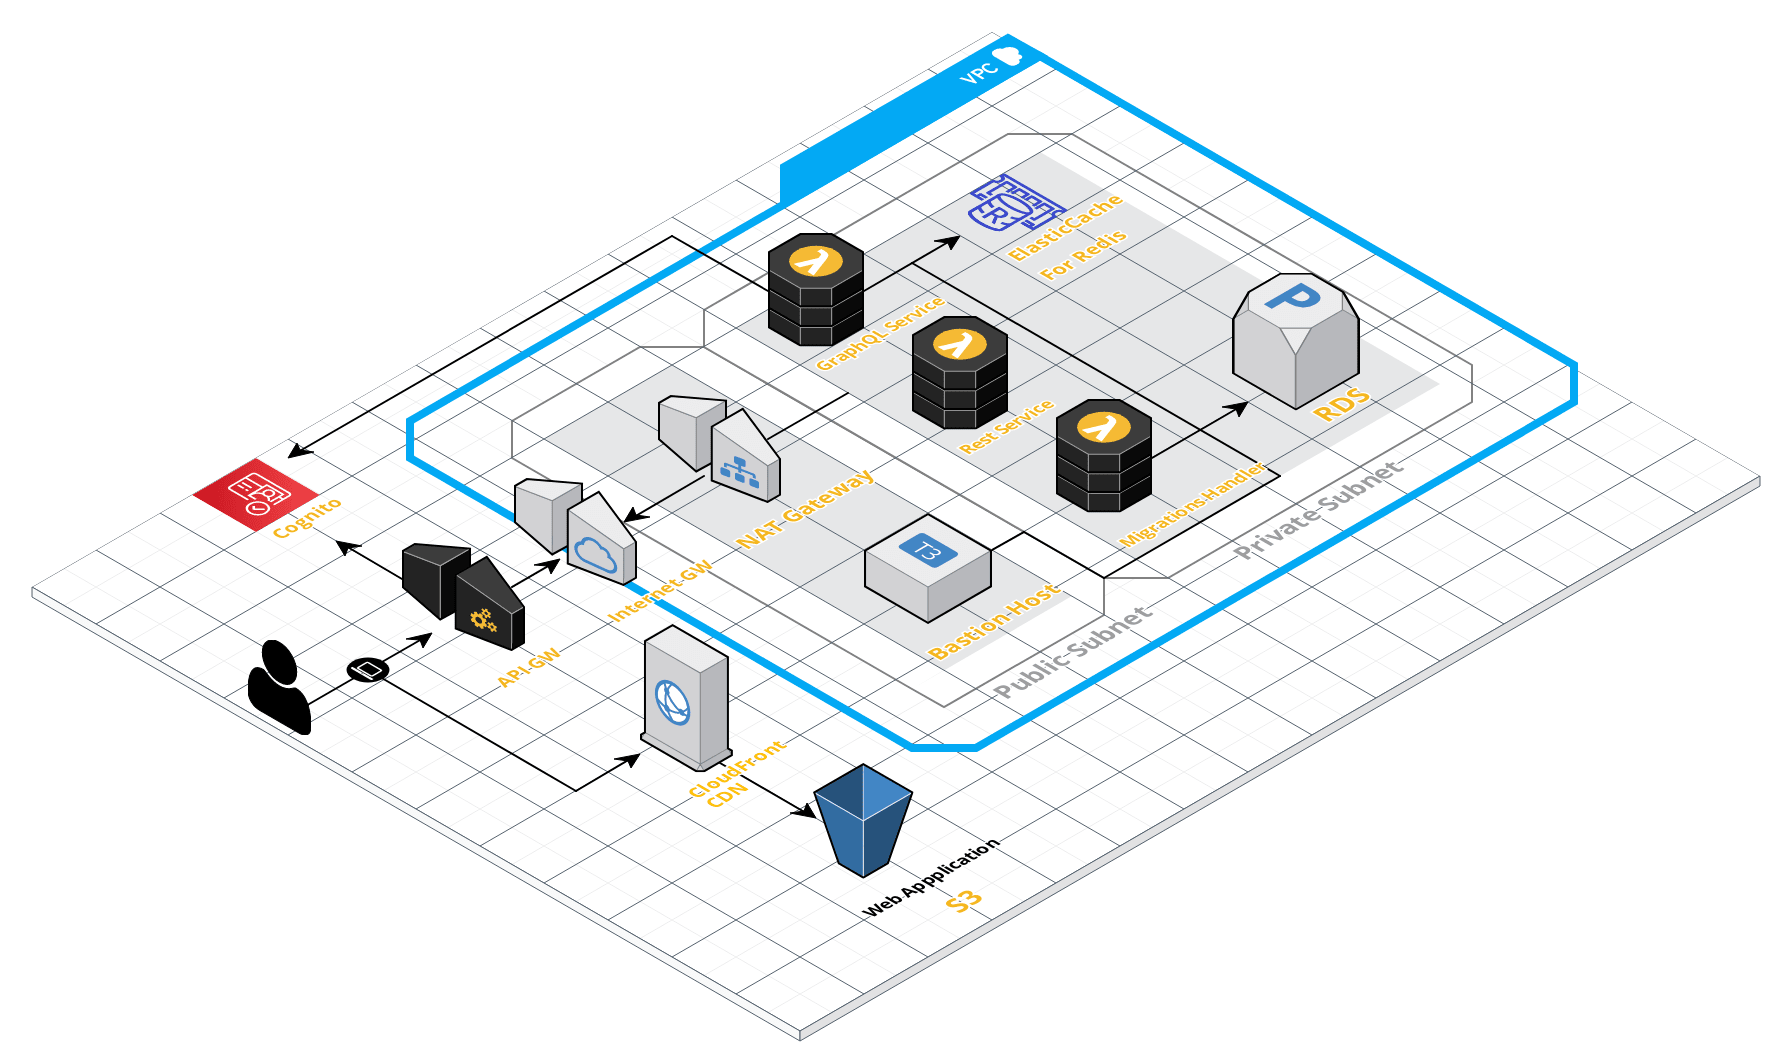
The view of all infrastructure components for our boilerplate.
Common components
- VPC
- RDS
- Bastion host
- Web client hosted in S3 bucket accessible from CloudFront.
- Artifact buckets
Specific components
- Cognito user pools for user authentication.
- Different service boilerplates using Serverless framework. (Rest lambdas, Graphql lambdas, Scheduling lambdas, Migration lambdas etc…)
In this first part of the series, we will go on to explain and build the VPC component of our infrastructure.
Preparing the AWS CDK project to create our components.
The language we will use will be TypeScript. AWS CDK also supports JavaScript, Java, Python, and C#.
The first thing we need to do is to configure our AWS CLI in our machine.
Since we are using TypeScript lets install it:
npm install -g typescript
And after that install AWS CDK:
npm install -g aws-cdk
Now let's create a new directory for our infrastructure.
mkdir infrastructure-components
cd infrastructure-components
Now initialise the app using the cdk init command, specifying the desired template (“app”) and programming language.
cdk init TEMPLATE --language LANGUAGE
In our case cdk init app --language typescript
This command will generate all the base structure we need to continue developing.
Next thing is to keep watching for changes in our .ts files and know where we have some type errors. Instead of building the app every time we make a change a better approach is to execute npm run watch. This will build the app every time we make a change.
Inside the lib dir we will create our custom resources (Constructs) and initialise them in the main file that the cdk cli has generated for us inside the lib dir (infrastructure-components-stack.ts).
The stack composed in lib/infrastructure-components-stack.ts will be executed from bin/infrastructure-components.ts.
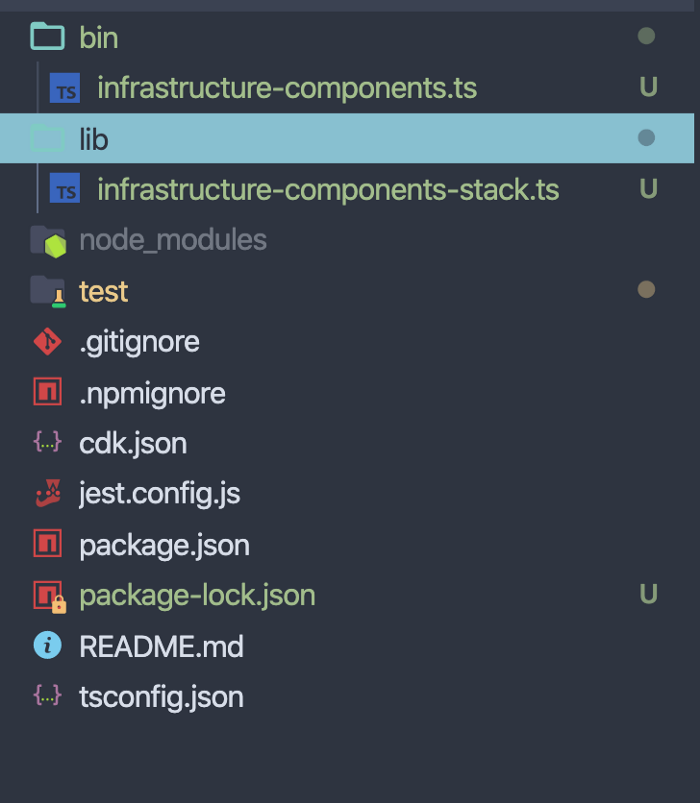
This is the structure generated from aws cdk cli.
Let's start creating our VPC resource. VPC is the private cloud we will use to put our servers, databases, lambdas etc.. in. Imagine it as a data center in the cloud.
Inside lib create a file vpc.ts. Next we need to install the aws-cdk/aws-ec2 module. This package contains the resources we need to build our vpc.
yarn add @aws-cdk/aws-ec2
Inside vpc.ts write the following:
We create a custom Construct easy configurable for a Vpc. All we need to do now is when we initialise it, to pass the CIDR block for the vpc, and the number of public and private subnets we want inside the vpc.
In lib/infrastructure-components.ts:
Now let's test it out. Before seeing the diff and deploy, we need to set our AWS_PROFILE variable with the name of profile that uses our aws cli credentials.
export AWS_PROFILE=[MY_PROFILE_NAME]
If you have just configured the aws cli for the first time, the profile name will be default.
Before running the diff and deploying the stack, we need to run cdk bootstrap . This creates the needed resources for AWS CDK to manage our deployments and check the current resources so it can make the difference from the new code.
Let's run:
cdk diff
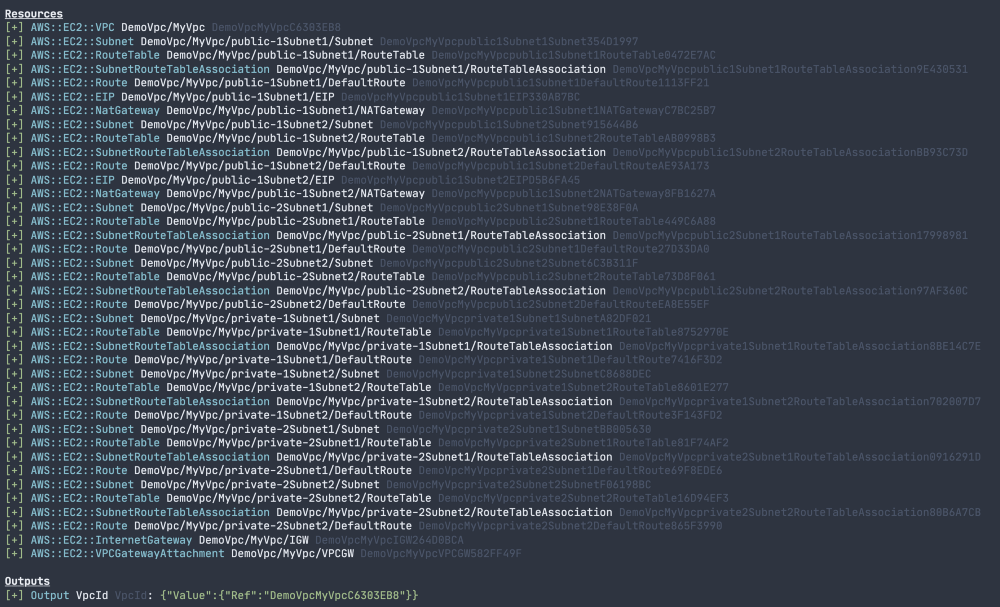
So little code we wrote, and look how much resources are created from behind. If we would go the CloudFormation way we would need to write specifications for each of these resources, but AWS CDK generates CloudFormation stacks for us. And if we would manually create these from the AWS console, it would take probably 1 to 2 days. With AWS CDK we just needed 30 mins to write the definition, and we can always use it. Building a VPC in the cloud in 5 mins.
Now just run cdk deploy, confirm the deployment, and wait for everything to be sent to the cloud.
In CloudFormation section in the console we see the following stack being created:

And after it finishes this output shows on our terminal:

And in CloudFront:

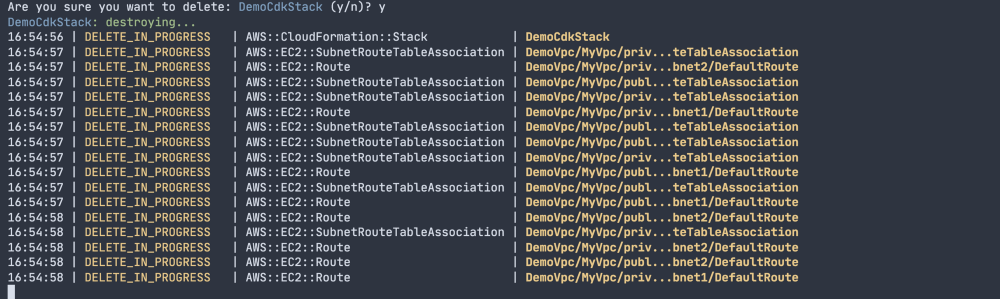
The stack is created, and we have a VPC up and running. If we want to destroy the stack run:
cdk destroy
Confirm the action and all the resources as were created, will be removed from our account.

In this first part, we saw how easy it is to set up things using AWS CDK. We started by building a VPC, the home of all resources that will come during the way of these series.
In the second part we are going to elaborate on our Authentication & Authorization service.
Happy coding and see you in the next one! :D