
How to deploy a monorepo to multiple Heroku apps using GitHub Actions
This article shows how to deploy a Node.js and React.js monorepo to multiple Heroku applications using GitHub Actions.


Heroku is one of the best cloud service providers which helps us build and deploy applications easily. Among other reasons, it is highly preferred by developers since it offers a free plan where you don't even need to register a credit card.
As stated above, Heroku makes deployments effortless and straightforward, provided that you have created a special file where you write a few instructions that are necessary to build and serve the application (i.e. the Procfile). The problem is that the standard Heroku setup requires one repository per application. What if we want to keep the whole stack in a single repository and deploy each application as a separate Heroku app?
In this article, we will provide a configuration which allows us to deploy a monorepo to multiple Heroku applications, using a few existing tools. The stack we will deploy is made up of one React client application and one Node.js Express API. To automate the build and deployment we will use GitHub Actions.
Application stack setup
(All the commands are executed on a macOS 10.14 operating system)
Step 1: GitHub setup
Before creating our applications, we need to set up a GitHub repository and clone the project in our own device:
$ cd ~/Desktop$ git clone git@github.com:zeroabsolute/MonorepoHerokuDeployment.git$ cd MonorepoHerokuDeployment/Step 2: API setup
In this step, we will create a very basic Express API which will provide a simple health endpoint.
Firstly, let’s create the API directory and add a package.json in it:
$ mkdir src
$ cd src
$ mkdir api
$ npm init
Next, let’s install the necessary packages:
$ npm install express corsNow let’s create an index file and put some code in it:
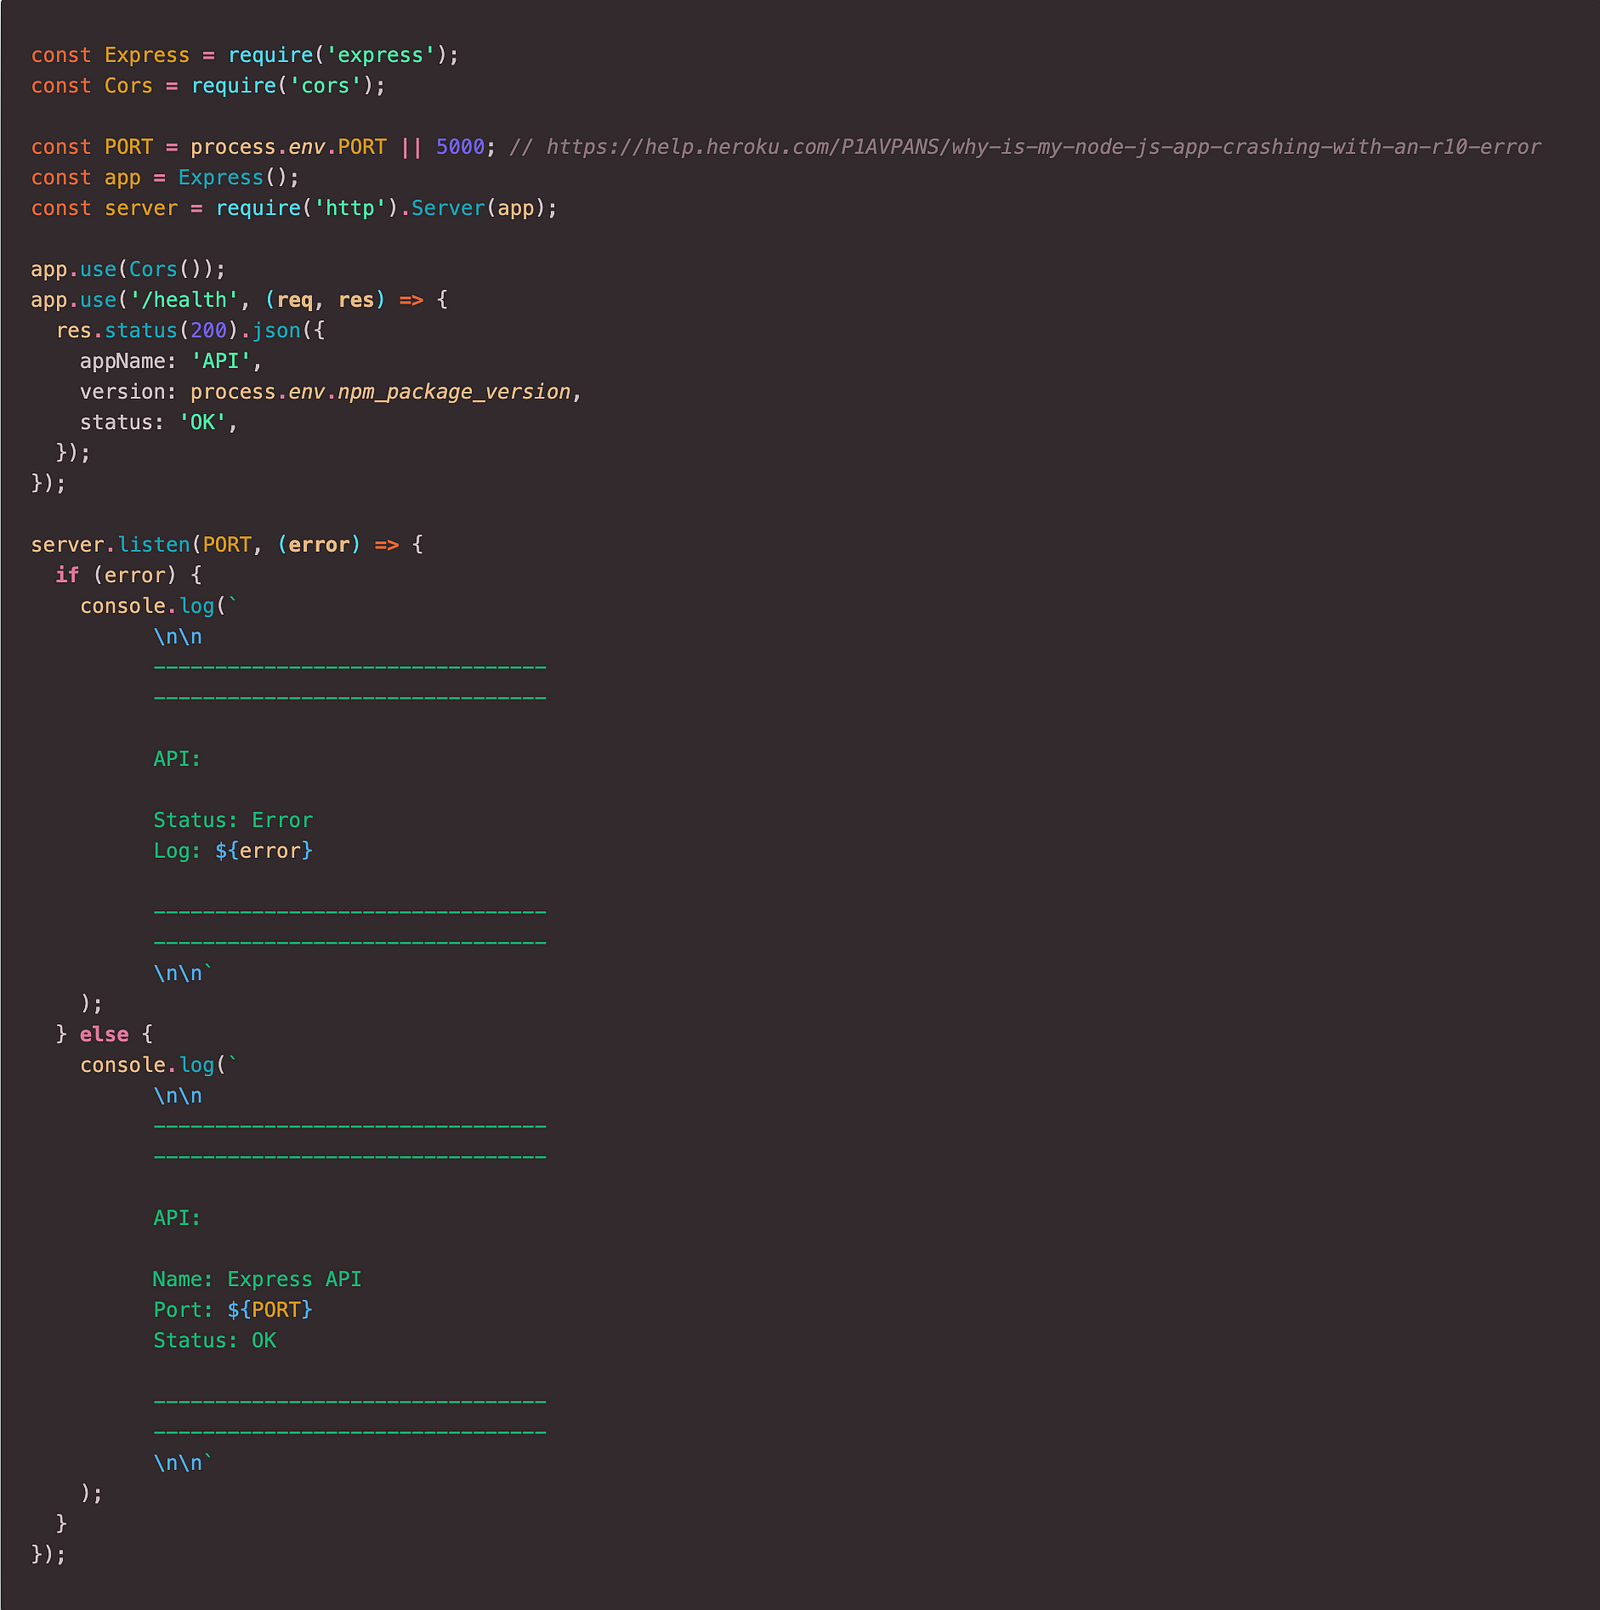
Finally, let’s run the API and test it by calling the health endpoint.
$ npm start
> api@1.0.0 start MonorepoHerokuDeployment/src/api
> node index.js
--------------------------------
--------------------------------
API:
Name: Express API
Port: 5000
Status: OK
--------------------------------
--------------------------------
We should get the following result:
$ curl localhost:5000/health
{"appName":"API","version":"1.0.0","status":"OK"}
Step 3: Client setup
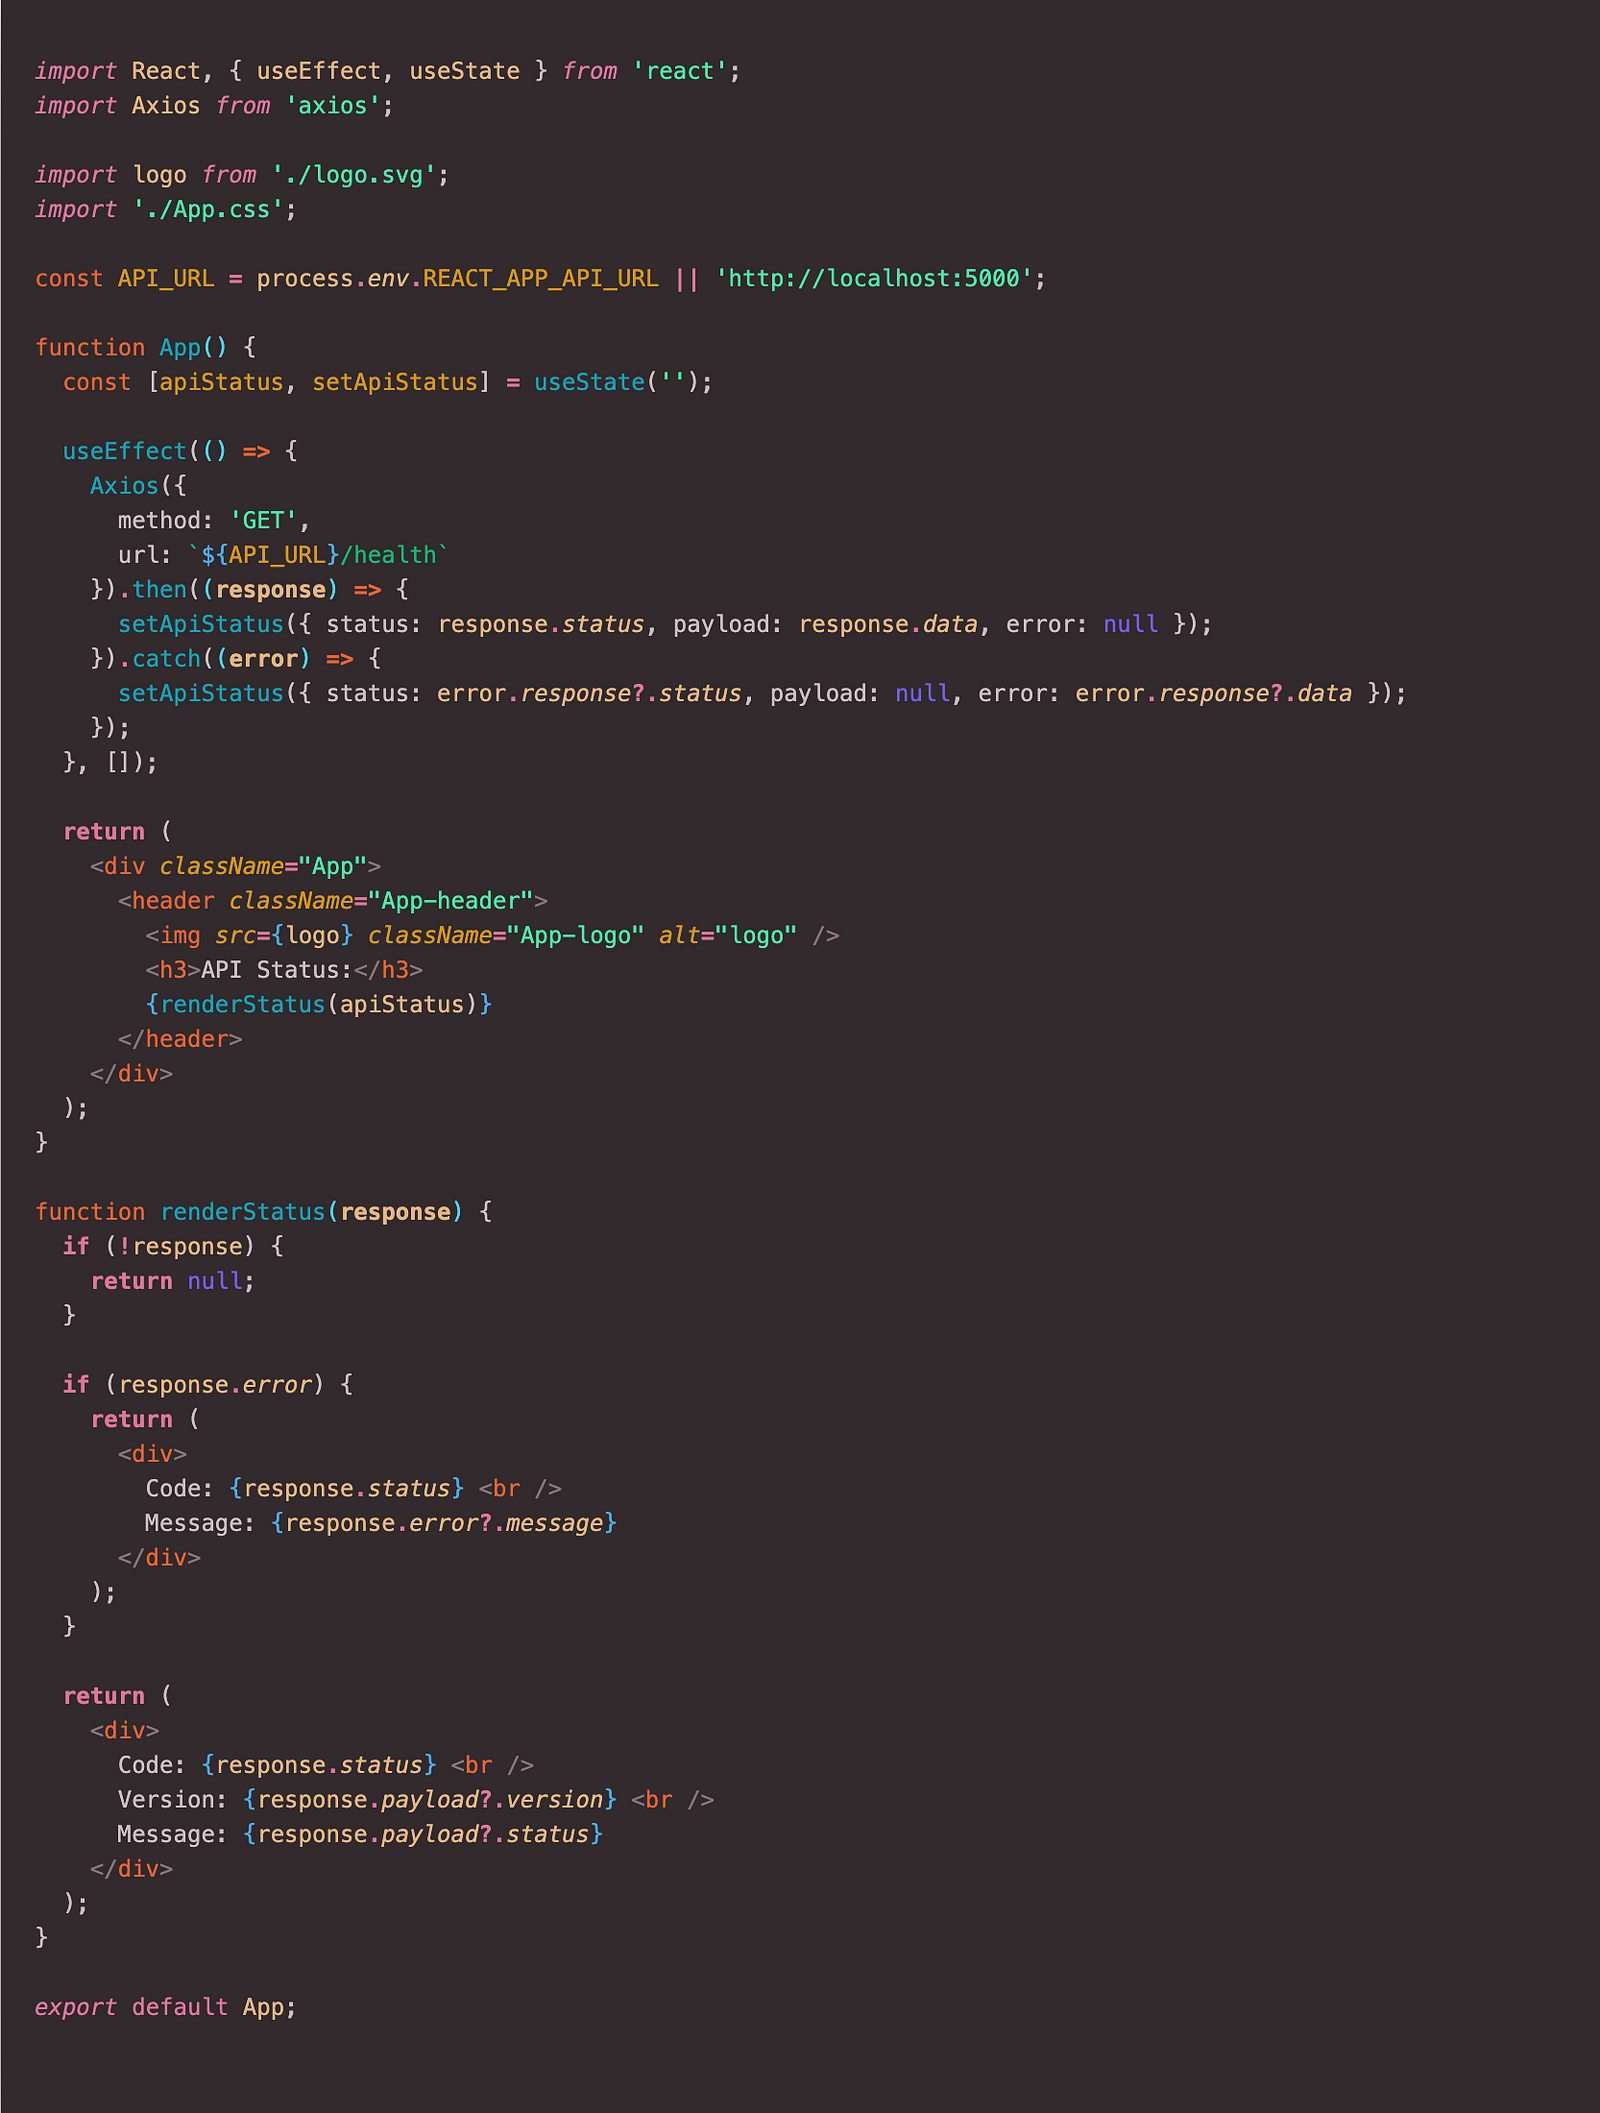
In this step, we will set up a minimalistic React application with create-react-app, which will use the health endpoint from the API and render the payload on the screen.
Firstly, let’s set up the directories and the CRA boilerplate.
$ cd src
$ npx create-react-app web-client
$ cd web-client
$ npm install axios
Next, we will slightly update the App.js file to use our API and call the health endpoint. The response will be rendered on the screen. Here is the final code after the edit:
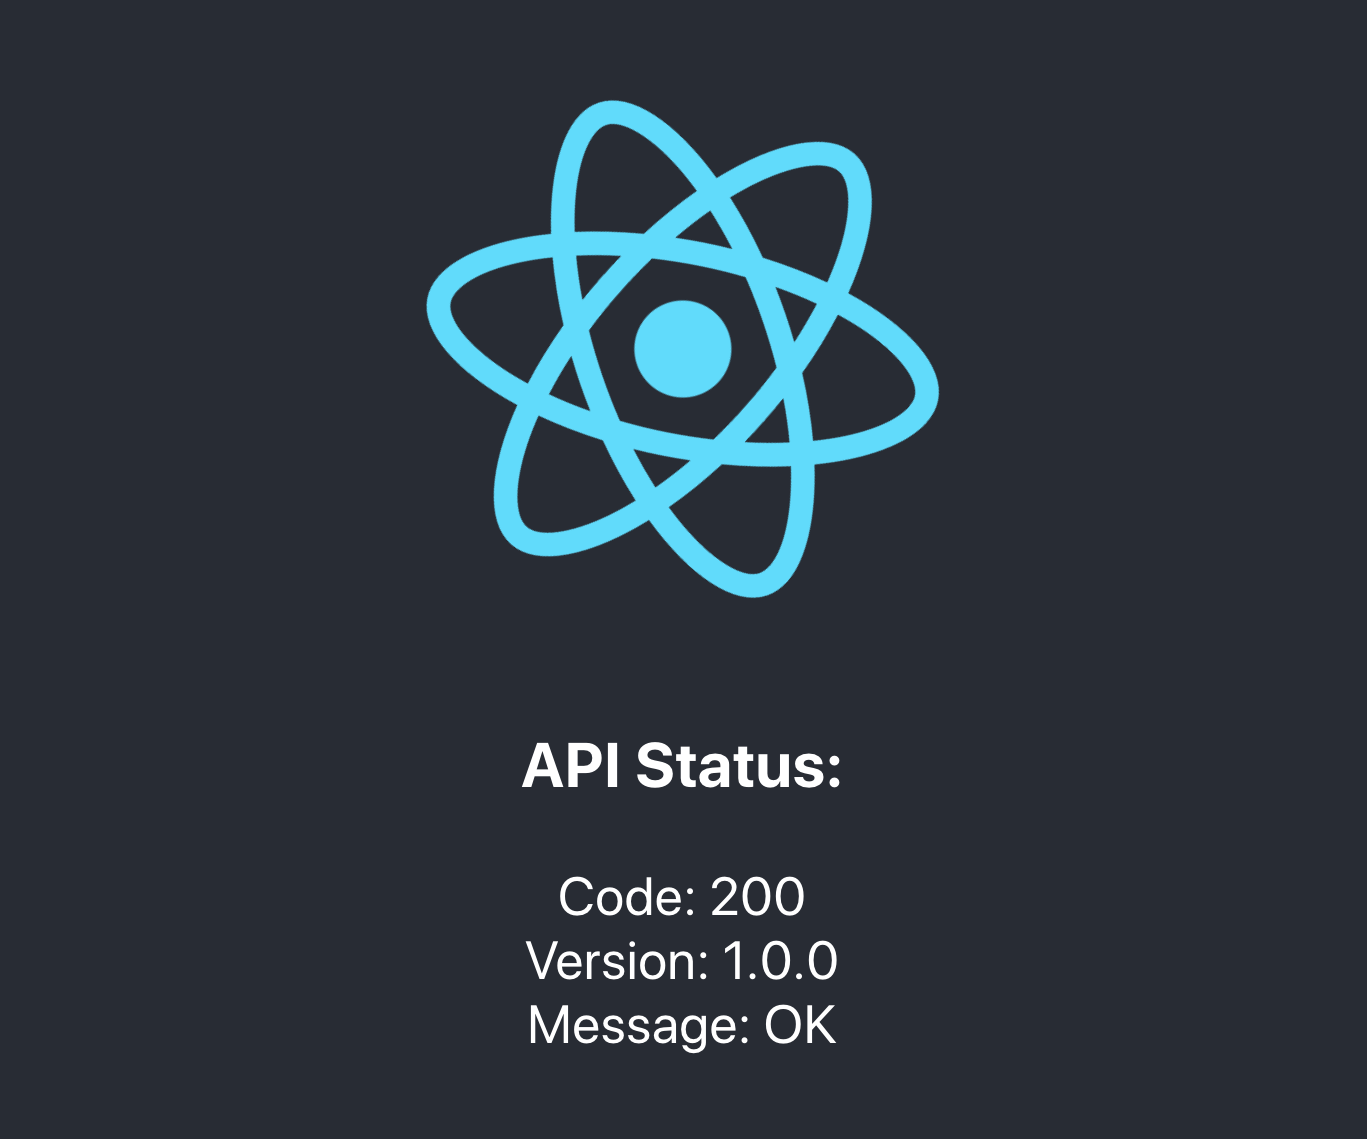
Finally, let’s test the client application locally. We should get the following result:
Heroku setup and configuration
After finishing the local project setup, we can move on and configure our Heroku apps.
If you don’t have the Heroku CLI installed in your device, you can follow this guide to install it and log in.
Firstly, we need to create two separate Heroku applications, one for the Express API and one for the React Web Client:
$ heroku create api-02092020

Creating ⬢ api-02092020... done
https://api-02092020.herokuapp.com/ | https://git.heroku.com/api-02092020.git

$ heroku create web-client-02092020

Creating ⬢ web-client-02092020... done
https://web-client-02092020.herokuapp.com/ | https://git.heroku.com/web-client-02092020.git
In the next step, we need to specify a buildpack for each of our applications — the Node.js buildpack and the Create-React-App buildpack for the API and the Web Client respectively.
$ heroku buildpacks:add -a api-02092020  heroku/nodejs

Buildpack added. Next release on api-02092020 will use heroku/nodejs.
Run git push heroku main to create a new release using this buildpack.

$ heroku buildpacks:add -a web-client-02092020 mars/create-react-app

Buildpack added. Next release on web-client-02092020 will use mars/create-react-app.
Run git push heroku main to create a new release using this buildpack.
Now we need to add another buildpack, the one which makes it possible to deploy many applications from one single repository — Heroku-buildpack-monorepo.
Note: We add the “-i 1” option at the end because this buildpack needs to be defined before the others like it is stated here.
$ heroku buildpacks:add -a api-02092020 https://github.com/lstoll/heroku-buildpack-monorepo -i 1

Buildpack added. Next release on api-02092020 will use:
1. heroku/nodejs
2. https://github.com/lstoll/heroku-buildpack-monorepo

$ heroku buildpacks:add -a web-client-02092020 https://github.com/lstoll/heroku-buildpack-monorepo -i 1

Buildpack added. Next release on web-client-02092020 will use:
1. mars/create-react-app
2. https://github.com/lstoll/heroku-buildpack-monorepo
For each application, we must also define the environment variable APP_BASE, which will represent the new project root directory.
$ heroku config:set -a api-02092020 APP_BASE=src/api

Setting APP_BASE and restarting ⬢ api-02092020... done, v4
APP_BASE: src/api

$ heroku config:set -a web-client-02092020 APP_BASE=src/web-client REACT_APP_API_URL=https://api-02092020.herokuapp.com

Setting APP_BASE, REACT_APP_API_URL and restarting ⬢ web-client-02092020... done, v5
APP_BASE:          src/web-client
REACT_APP_API_URL: https://api-02092020.herokuapp.com/
Let’s try to push our changes manually to Heroku, before automating the process with GitHub Actions:
$ git remote add heroku-api https://git.heroku.com/api-02092020.git
$ git remote add heroku-web-client https://git.heroku.com/web-client-02092020.git
$ git push heroku-api master
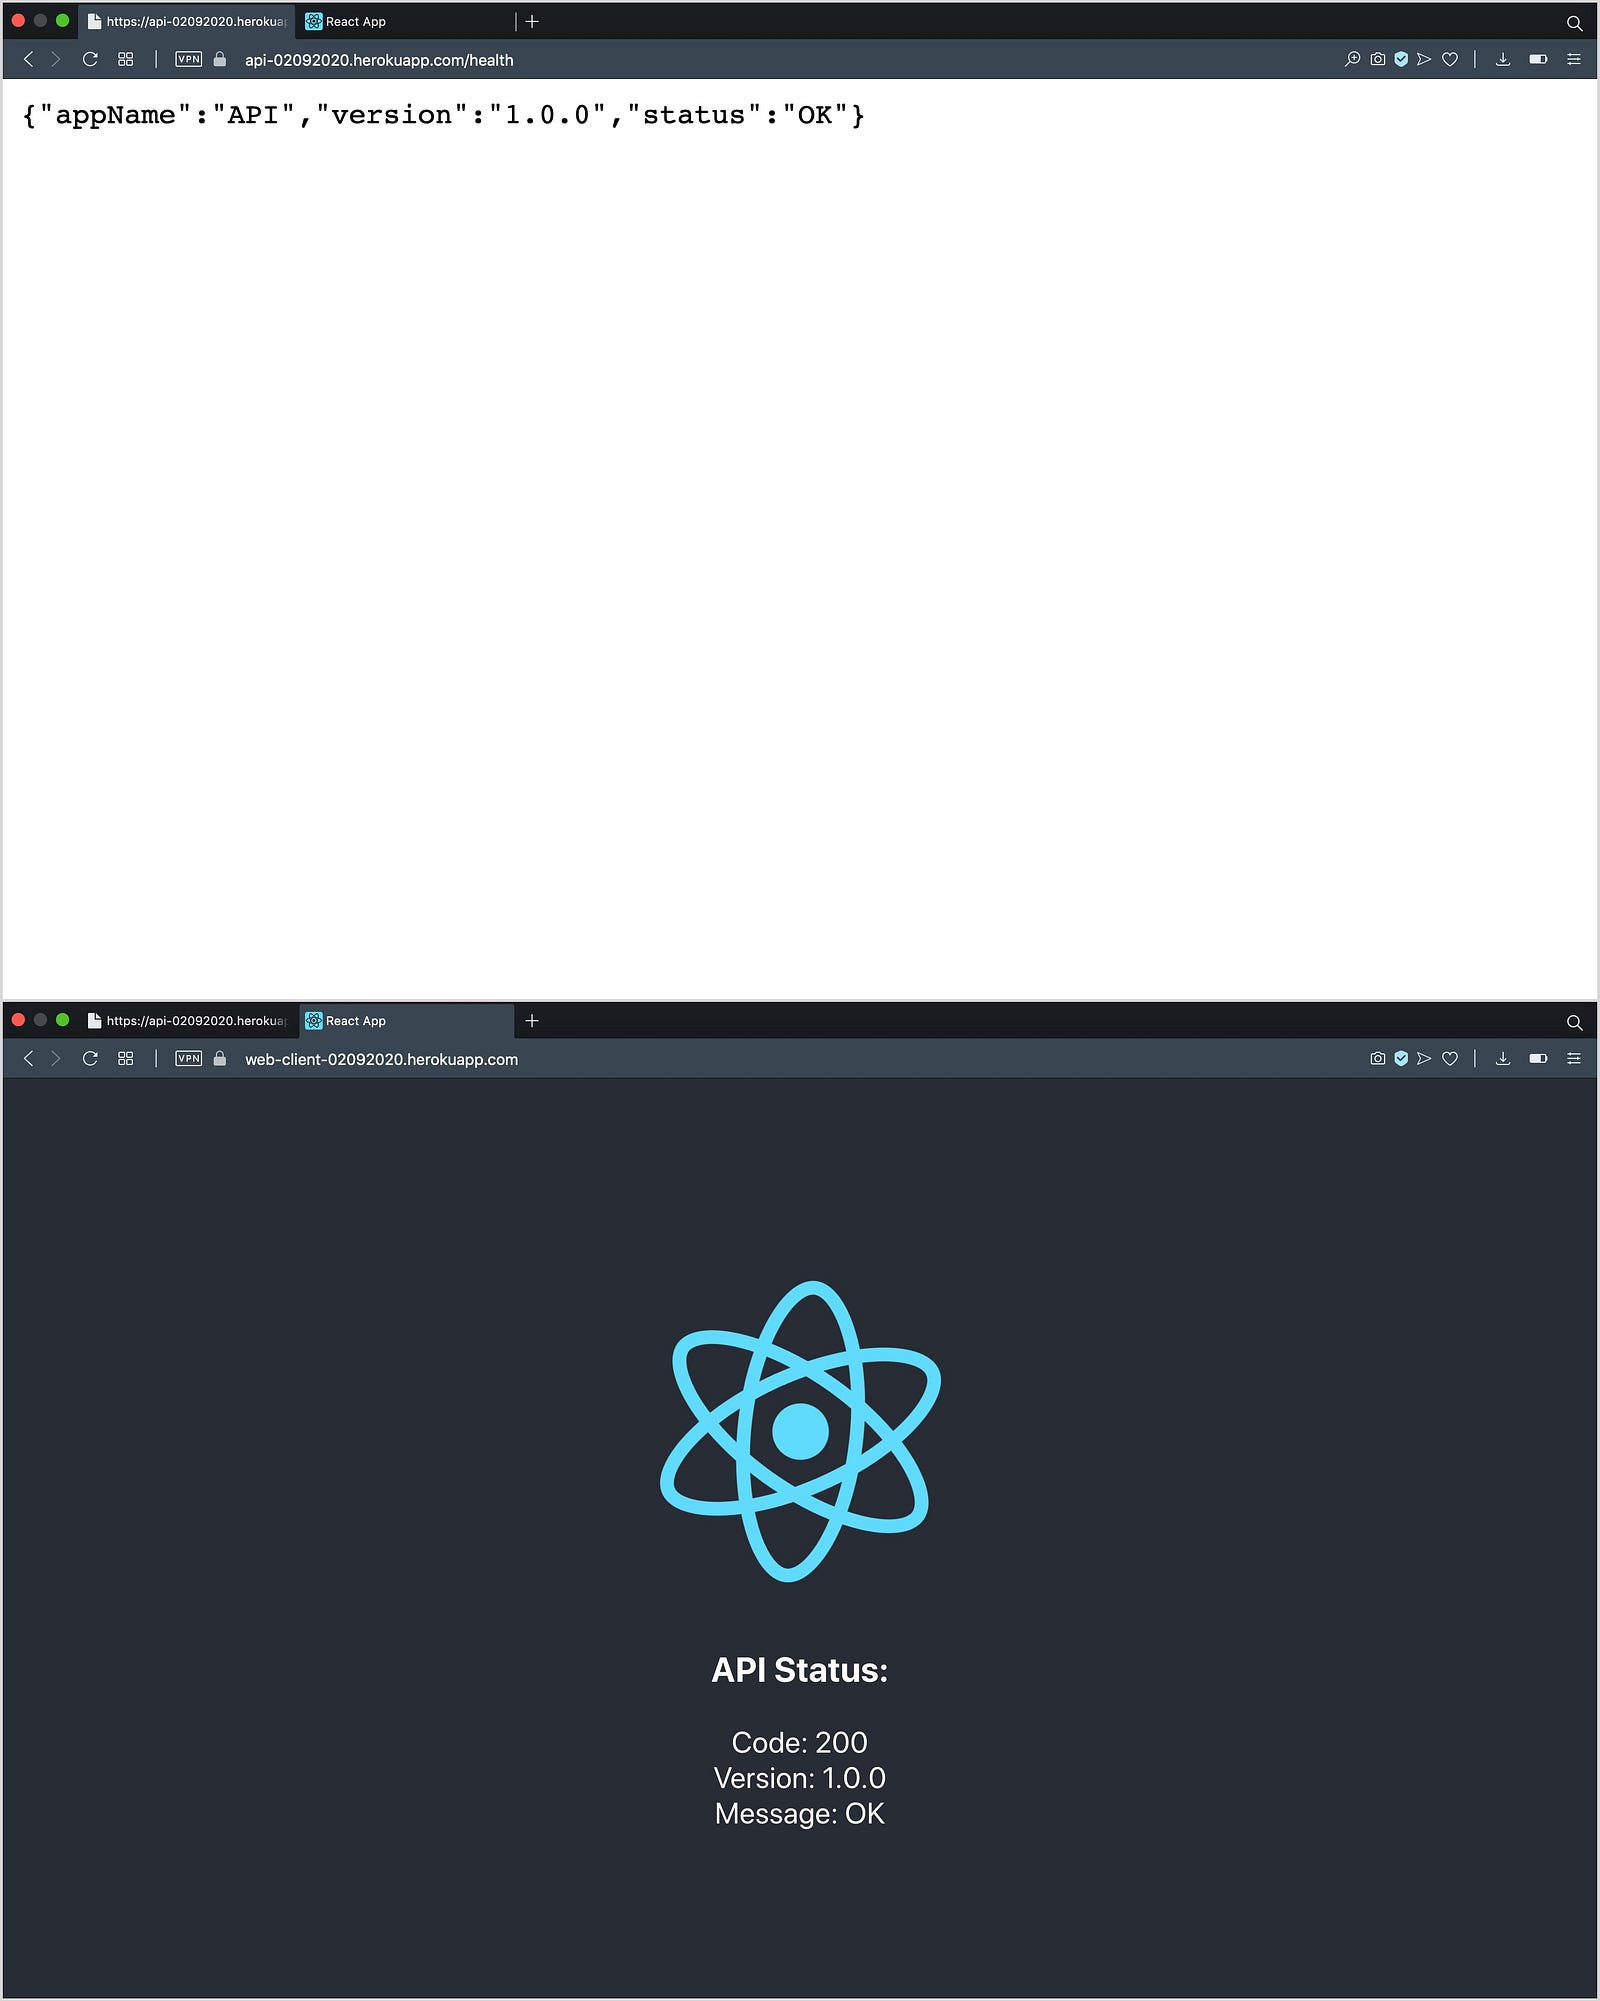
$ git push heroku-web-client masterThe deployment for both applications should succeed. If we try to access each of them on the URLs provided by Heroku, we should see some output on the screen.
Automating the deployment with GitHub Actions
To avoid typing the above commands manually, we can declare a GitHub Actions script which will handle the Heroku environment setup and deployment automatically, as soon as we push our code to GitHub. We will use the following plugin to deploy to Heroku: https://github.com/AkhileshNS/heroku-deploy
Step 1: Store the Heroku API key to GitHub Secrets
Navigate to https://dashboard.heroku.com/account and scroll to the end of the page to get the API Key for your account. After pressing “Reveal”, copy the key and navigate to your Secrets tab on your GitHub project using the following URL: https://github.com/{username}/{repository}/settings/secrets. Press “New secret” and paste the value of the API key. You can put any name you want for the key (in our case, the variable name will be HEROKU_API_KEY).
Step 2: Add the GitHub Actions script
On the root directory of the project, we will add the following file: “.github/workflows/.deploy.yaml”. The implementation will be the following:
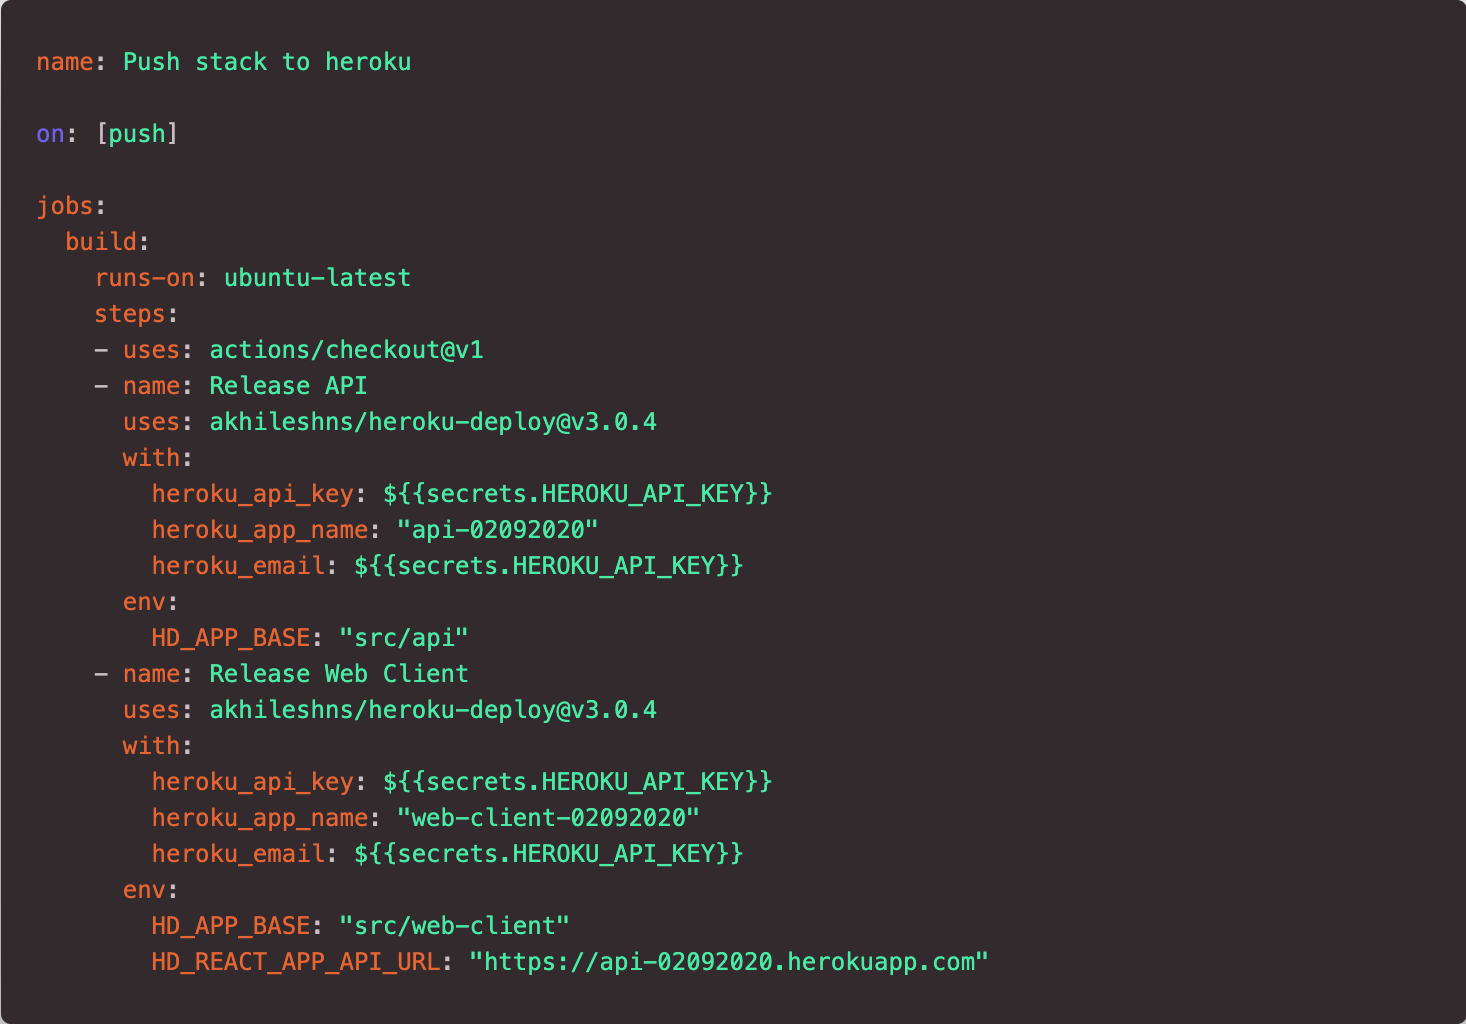
The script is composed of three steps: Firstly, it checks out to our repository. On the second and third steps, it uses the heroku-deploy plugin to deploy the API and Web-Client apps to Heroku and to configure their environments.
Step 3: Push to GitHub
Once we are done with the implementation of the GitHub Actions script, we can push our changes to GitHub. The workflow should start automatically and our applications will be deployed.
To see if the deployments have succeeded, we can use the URLs provided by Heroku.
The full source code can be found here: https://github.com/zeroabsolute/MonorepoHerokuDeployment